
Namecheap DNS vs a registrar transfer
Connecting a Namecheap domain to Cloudflare DNS and transferring the domain registration are related but different jobs. A DNS change keeps Namecheap as the registrar while Cloudflare answers DNS queries. A registrar transfer moves renewal billing and registration management to Cloudflare Registrar. You can use Cloudflare DNS without completing the second job.
This distinction matters because changing nameservers does not move your site files, WordPress installation, mailbox or email subscription. It only changes which DNS service publishes records such as A, AAAA, CNAME, MX and TXT. Before touching nameservers, identify where the website and email are hosted and make sure the matching records exist in Cloudflare.
Check eligibility before you start
Cloudflare's current transfer documentation says the domain should be active, use a supported TLD, and normally be at least 60 days past its initial registration or most recent registrar transfer. A recent change to registrant name, organization or email can also create a 60-day lock. An expired domain should generally be renewed at Namecheap before starting. If you renewed just after expiration, Cloudflare recommends waiting at least 45 days from the original expiration date when preserving the expected one-year extension matters. For a registrar-neutral eligibility checklist, see how to unlock a domain for transfer.
| Preflight check | Ready state | If it fails |
|---|---|---|
| Domain age and transfer history | More than 60 days since registration or last transfer | Wait until the lock ends; do not repeatedly restart the transfer |
| Expiration status | Active and not in redemption or pending delete | Renew or restore at Namecheap before moving |
| Registrant contact | Accessible email and no recent locked change | Resolve verification and lock issues first |
| TLD support | Listed by Cloudflare Registrar | Keep Namecheap or choose another supported registrar |
| DNS control | Cloudflare nameservers can be used permanently | Stop if you require Route 53, custom or third-party authoritative nameservers |
How to transfer domain from Namecheap to Cloudflare
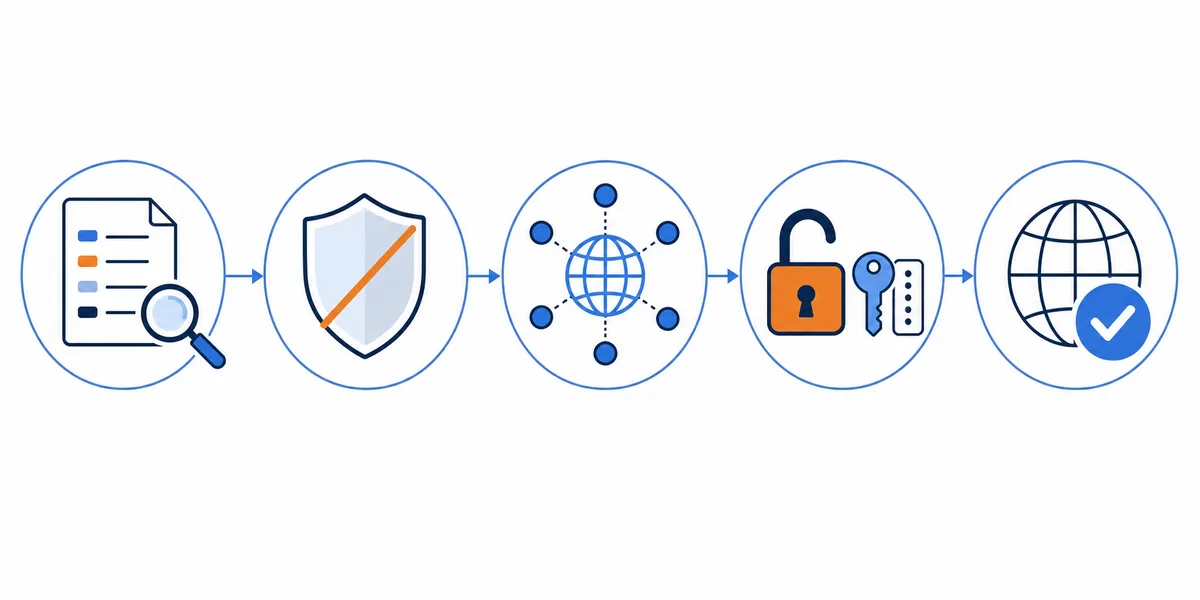
The safe sequence is DNS first, registration second. That order lets Cloudflare become authoritative before Namecheap releases the registration and gives you time to test the website and email while the domain is still managed in the familiar Namecheap account.
1. Inventory your DNS records
In Namecheap, review the current Advanced DNS records and any DNS records held by your hosting provider. Record the website IP or CNAME, all MX records, SPF, DKIM, DMARC, verification TXT records, subdomains and less obvious service records. A Cloudflare scan is a helpful starting point, but it may not discover every record. Take a copy before the change and compare the two zones line by line.
2. Disable DNSSEC before changing nameservers
If Namecheap currently publishes a DS record, turn DNSSEC off before switching authoritative nameservers. Old DNSSEC data paired with new Cloudflare nameservers can cause validation failures that look like a complete outage. Cloudflare advises allowing time for the DS removal to propagate; its current guide uses 24 hours as the conservative waiting period. Enable DNSSEC again from Cloudflare only after the transfer and DNS are stable.
3. Add the site to Cloudflare and review the imported zone
Add the root domain to Cloudflare, select the appropriate plan and inspect the scanned records. Match mail records especially carefully: missing MX or DKIM records can leave the website online while mail silently fails. Cloudflare's orange proxy is appropriate for supported web traffic, but mail hosts and verification records should normally remain DNS-only. Use the record purpose, not guesswork, to choose the proxy state.
4. Change Namecheap to the assigned Cloudflare nameservers
Open Namecheap's Domain List, choose Manage, locate Nameservers, select Custom DNS, and enter the two nameservers assigned to your Cloudflare zone. Save the change, then wait for Cloudflare to show the domain as Active. Cloudflare will not accept the authorization code while the zone is Pending. Test the homepage, important subdomains and inbound/outbound email before proceeding.
5. Unlock the domain in Namecheap
Return to the Namecheap domain management page and switch Domain Lock off. Registry status should no longer show clientTransferProhibited. If Cloudflare still reports the domain as locked, allow time for the status to update and check whether another transfer or security lock is active.
6. Request the Namecheap Auth/EPP code
Request the authorization code from Namecheap only when you are ready to use it. Depending on the TLD and account flow, Namecheap may reveal the code or send it to the registrant email. Treat it like a temporary password: do not publish it, store it in screenshots, or send it through untrusted support channels.
7. Start the transfer in Cloudflare Registrar
Open Cloudflare's Transfer Domains area, select the eligible domain, enter the authorization code, review the transfer price, confirm accurate registrant contact details, and pay. For many generic TLDs—including .com, .net and .org—the transfer fee includes a one-year extension. Country-code domains can have different fees and renewal rules, so verify the exact TLD rather than assuming the .com process applies.
8. Approve the outgoing transfer
Watch the registrant email and the Namecheap dashboard for an approval request. Approving the release can shorten the wait; without manual approval, the losing registrar may take several days. Cloudflare says a previous registrar can normally take up to five days after a valid request, while certain TLDs can take longer. Do not change DNS records merely because the registration status says Pending Approval.
Prevent website and email downtime
A registrar transfer does not inherently require downtime. Most failures happen because the DNS zone copied incompletely, DNSSEC stayed enabled against the old provider, or email records were overlooked. Keep the website hosting account and Namecheap email service active until you have independently tested the replacement DNS path. Transferring the registrar does not automatically cancel a separate hosting or email subscription.
- Compare A, AAAA, CNAME, MX, TXT, CAA and SRV records before changing nameservers.
- Test the root domain,
www, login/admin paths and important subdomains. - Send mail both to and from the domain, then verify SPF, DKIM and DMARC results.
- Keep the old hosting and email plans active until the transfer is complete and monitored.
- Re-enable DNSSEC in Cloudflare only after the zone is stable.
Transfer cost and renewal trade-offs
Cloudflare advertises registrar pricing at registry and ICANN cost without a retail markup, but the exact amount varies by TLD and can change. Namecheap may be preferable when you value its interface, support model, bundled products or the ability to use other authoritative nameservers. Cloudflare Registrar requires Cloudflare authoritative DNS, so lower renewal pricing is not the only decision variable.
Before paying, compare the current transfer row on our domain transfer cost page, the live Namecheap domain prices, the Cloudflare registrar price table, and the exact extension page such as .com domain prices. Separate the one-time transfer price from the next renewal price; the cheapest transfer offer is not necessarily the lowest three-year cost.
Troubleshooting a failed or stuck transfer
| Symptom | Likely cause | What to check |
|---|---|---|
| Cloudflare zone stays Pending | Wrong nameservers, cached delegation or active DNSSEC | Confirm assigned nameservers and remove old DS records |
| Domain is not eligible | 60-day lock, unsupported TLD, expiry or registry status | Check WHOIS/RDAP status and Cloudflare's supported TLD list |
| Authorization code rejected | Copied incorrectly, expired or regenerated | Request a fresh code and paste it without spaces |
| Transfer remains Pending Approval | Namecheap has not released it | Use the Namecheap approval email/dashboard or wait for automatic release |
| Website works but email fails | Missing or proxied MX/mail records | Restore MX, SPF, DKIM and DMARC; keep mail hosts DNS-only |
| Transfer payment fails | Invalid card or fraud control | Update the Cloudflare payment method before retrying |
When not to transfer to Cloudflare
Do not transfer if the domain must use external authoritative nameservers, the TLD is unsupported, a sale or ownership change is already in progress, or the domain is too close to a risky expiration state. Also pause when you cannot account for critical DNS or email records. You can still use Cloudflare DNS and security while keeping the registration at Namecheap, which is often the simpler choice when the billing difference is small.
Official procedure references
This guide was checked on July 25, 2026 against Cloudflare's registrar transfer documentation, its failed-transfer troubleshooting, Namecheap's Cloudflare DNS setup guide, and Namecheap's domain transfer instructions. Dashboard labels and registry-specific rules can change, so use the official status shown for your domain as the final authority.
Namecheap to Cloudflare transfer FAQ
Can I transfer a domain from Namecheap to Cloudflare?
Yes, when Cloudflare supports the TLD and the domain is eligible. Add it to Cloudflare DNS first, wait for Active status, then unlock it at Namecheap and submit the Auth/EPP code to Cloudflare Registrar.
How long does a Namecheap to Cloudflare transfer take?
The DNS preparation takes minutes to hours. After a valid transfer request, Namecheap may release the registration after approval or within several days. Cloudflare notes that some TLD transfers can take up to 10 days.
Will my website go down during the transfer?
A registrar transfer should not take the site offline when Cloudflare already has a complete DNS zone. Downtime usually comes from missing records, old DNSSEC data, or stopping hosting or email too early.
Do I need to change nameservers before transferring to Cloudflare?
Yes. Cloudflare Registrar requires the domain to use Cloudflare authoritative nameservers and show Active status before it accepts the authorization code.
Where do I get the Namecheap authorization code?
Open the domain management area at Namecheap, unlock the domain, and request the Auth Code or EPP code. The exact delivery method can vary by TLD and account.
Does a transfer to Cloudflare add one year?
Most generic TLD transfers include a one-year extension, but country-code and registry-specific rules vary. Verify the exact extension and price shown in Cloudflare before paying.
Can I keep Namecheap hosting or email after the transfer?
Usually yes, because hosting and email are separate services. Keep the required A, CNAME, MX and TXT records in Cloudflare DNS and leave the subscriptions active.
Can I use another DNS provider with Cloudflare Registrar?
No. Cloudflare Registrar requires Cloudflare authoritative DNS. If external nameservers are essential, keep the registration at Namecheap or choose another registrar.
Transfer safely: DNS first, registration second
The safest Namecheap-to-Cloudflare transfer is deliberately uneventful. Build and test the Cloudflare DNS zone, remove DNSSEC conflicts, wait for Active status, then unlock the domain and use the Namecheap authorization code. Keep hosting and email running, approve the release, and monitor the site until Cloudflare shows the registration as complete.